Setup for Automated Video Capture Using Adobe Premiere and a Sony DigiBeta Deck
Connecting the cables
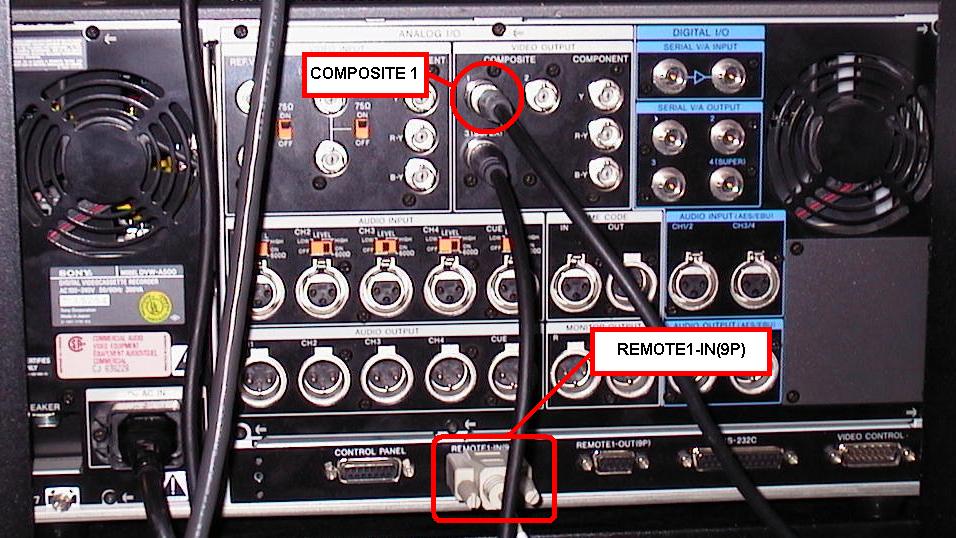
For automated video capture from a Sony DigiBeta a video cable and a control cable must be attached. The control cable is attached to the REMOTE1-IN(9P) connector on the back of the deck. The video cable is attached to a VIDEO OUTPUT composite connector. There are three composite video output jacks 1, 2, 3 (SUPER). Any of the jacks may be used but the 3 (SUPER) jack may have timecodes overlayed on the video. If you do not want timecodes in your captured video do not use composite video output jack 3 (SUPER). Below is an image of connectors on the back of a Sony DigiBeta deck.
Front panel controls
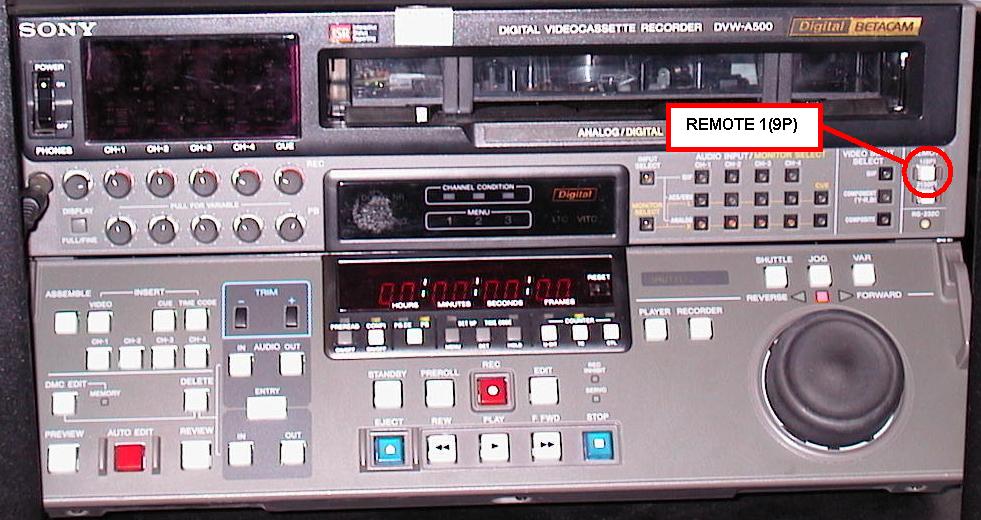
In order for Adobe Premiere to control the deck the front panel button ‘REMOTE 1(9P)’ must be lit. If this button is not lit press it. Below is an image showing the location of the front panel ‘REMOTE 1(9P)’ button.
Once the connections are made and the front panel button is active you are ready to start capturing video using Adobe Premiere.