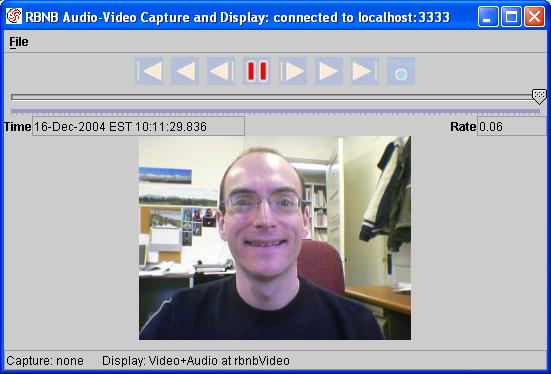
Screencapture of the rbnbAVCP application.
Introduction
Overview
Setup and StartupMenu Bar
File
Capture Parameters
Operation Controls
Screencapture of the rbnbAVCP application.
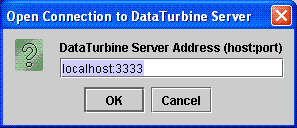
| Connect... | Open a connection between rbnbAVCP and a DataTurbine. Provide the host (name or IP address) and port number of the DataTurbine to which you would like to connect. An example of the connection dialog is shown below. |
| Disconnect... |
Close the current connection between rbnbAVCP and the DataTurbine. |
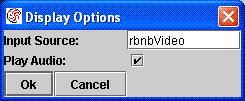
| View... |
Specify the name of the DataTurbine source from which to
request audio-video data. An example of the dialog box is shown
below. The "Play Audio" checkbox allows the optional playing of
the sound channel from the source. In the specified DataTurbine
source, the video data will come from a channel with the name
"Video.jpg" and the audio data will come from a channel with the name
"Audio". |
| Close |
Close the audio-video
display. This will not effect the current capture mode (if data
is currently being captured). This operation only effects the
display of the video and audio data. |
| Capture...
|
Capture audio and video data
from a connected device and send the data to the connected
DataTurbine. You must already have established the DataTurbine
connection using the "Connect..." menu item. A dialog pops up
allowing the user to configure the capture parameters. The
parameters on this dialog are discussed below. |
| Stop Capture |
Stop a currently active capture. |
| Exit | Exit the rbnbAVCP program. |
 |
Go to beginning (oldest) of data. |
 |
Play continuously backwards. |
 |
Single-step one interval backwards. |
 |
Pause (stop) playback. |
 |
Single-step one interval forwards. |
 |
Play continuously forwards. |
 |
Go to end (newest) of data. |
 |
Real-time (continuous) update. |
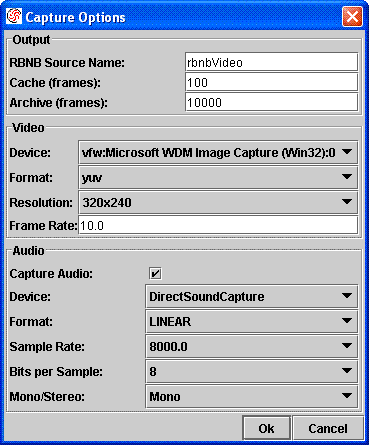
| RBNB Source Name |
Desired name of the source in the connected DataTurbine where
audio-video data should be stored. |
| Cache (frames) |
Specifies the size of the in-memory cache in terms of number
of frames. |
| Archive (frames) |
Specifies the size of the data archive in frames. This
can be set to 0, in which case no archive will be created. |
| Device |
Specify the device from which to capture video data. |
| Format |
Specify the format of the captured video image. The selections in this list are dependent on the capabilities of the selected video device. |
| Resolution |
Specify the number of pixels per captured image. The
selections in this list are dependent on the capabilities of the
selected video device. |
| Frame Rate |
Specify the number of video frames sent to the DataTurbine
per second. |
| Capture Audio |
Specify if you would like to capture audio data along with
the video data by selecting (capture audio data) or unselecting (do not
capture audio data) this checkbox. |
| Device |
Specify the device from which to capture audio data. |
| Format |
Specify the format of the captured sound data. The selections in this list are dependent on the capabilities of the selected audio device. |
| Sample Rate |
Specify the sample rate, in samples per second. The selections in this list are dependent on the capabilities of the selected audio device. |
| Bits per Sample |
Specify the number of bits per sample. The selections in this list are dependent on the capabilities of the selected audio device. |
| Mono/Stereo |
Specify if you would like to capture a mono or stero audio signal. The selections in this list are dependent on the capabilities of the selected audio device. |