Mill-Turn Component Library dialog box
Use the Mill-Turn Component Library dialog box to create and manage the components that are stored in a component library (.mcam-gmd ). Any of the following components can be added to the library:
- tool locators
- chucks
- chuck jaws
- collets
- turret-mounted steady rests
You can also select which chucks and chuck jaws will be the default components for each spindle.
Use component groups to organize the components in the library.
- Use Tools groups—Upper Left Tools, Upper Right Tools, Lower Left Tools, Lower Right Tools—to organize tool locator and steady rest components according to upper and lower turrets.
- For most machines, the convention is to use the Left Tools groups, since most turrets can be used on either spindle. Right Tools groups are usually only used for machines with three or more turrets.
- Before you can add components to a Tools group, you must add a turret or tool spindle component to the group.
- Use Chucks and Chuck Jaws groups to organize chucks and jaws.
- Use Default Component Groups to identify which chucks and jaws will be the default components for each spindle.
Your .machine file developer may have renamed the component groups in your library. In this case, the group names might not match the names used in this topic. For example, in this component library the developer removed the word Left from the group names.
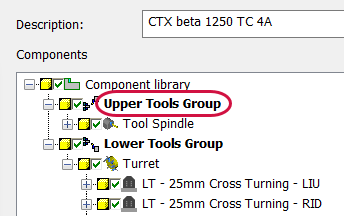
 Adding or removing a component group
Follow these steps to add or remove a component group:
- Right-click on Component library at the base of the component tree and select Groups.
The Groups dialog box displays.
- Select each group that you want to include in the library.
- Deselect each group that you want to remove from the library.
- Click OK.
Mastercam only allows one group of each type to be added to the library.
Before you can remove a group, you must first remove all of its components. Then follow the above steps.
Displaying and hiding turret-mounted components
After you create a tool locator or steady rest, follow these steps to preview it on the turret.
- Locate the component in the component tree.
- Click the yellow box in front of the Tools Group that contains the component.
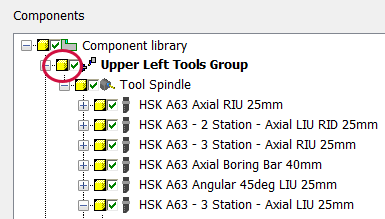
The yellow boxes toggle to black.
- When the box is black, the component is hidden when you view components or groups in the graphics window.
- When the box is yellow, the component will be displayed.
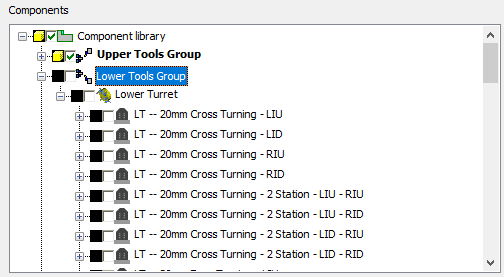
- Click the boxes for the turret or tool spindle component and the component that you want to preview so that they turn yellow.

- Right-click on the turret and select View component group.
- Rotate the turret and inspect the tool locator or steady rest. Make sure that it mounts correctly and is in the proper orientation.
Saving component libraries
You will most often open the Mill-Turn Component Library dialog box by double-clicking on a component library when your .machine file is open in Code Expert. Click the Save button on the toolbar.
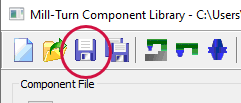
After doing this, you must also save the .machine file when you return to Code Expert.
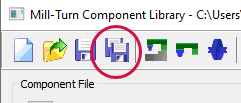
You can also save the component library as a standalone file on your workstation instead of to the .machine file. Do this when you want to share the component library with others who might have different .machine files. Use the Save As button and choose any location on your workstation:
See Saving Updated Files to a .machine File to learn more.
Component libraries used in Mastercam Mill-Turn are not compatible with component libraries used in other Mastercam products, even though both use the same .mcam-gmd file extension. This dialog box is only used for Mill-Turn component libraries.
Toolbar buttons
| Icon |
Description |
|---|---|

|
New Creates a new component library. |

|
Open Opens an existing component library. |

|
Save Saves changes to the current component library. NOTE
If you opened the component library from a .machine file directly from Code Expert, you must also return to Code Expert and save the .machine file for your changes to be effective. |

|
Save As Saves a copy of the current component library with a new name. If you opened the component library directly from the .machine file, click this button to save a copy as a standalone file in your local file system. |

|
View entire machine Displays all the components in the library. This is typically only useful if you have hidden most of the components, since tool locator models are usually drawn at the origin and using this command results in all of them being displayed on top of each other. |

|
View component group Displays all the components in the current component group. This is typically only useful if you have hidden most of the components, since tool locator models are usually drawn at the origin and using this command results in all of them being displayed on top of each other. |

|
View component Displays the current component. |

|
Convert to mesh Opens the Mesh Conversion Options dialog box where you can convert the solid component models that have been saved in the component library to either mesh or MCO entities. MCO is an encrypted mesh format similar to an STL file. It stands for Machine Component Object, and was developed by Mastercam specifically for machine models. The machine definitions (.mcam-lmd ) and component libraries (.mcam-gmd ) that are used in the released versions of Mill-Turn .machine files are converted to this format. Use this format when you need to prevent the original models from being distributed or edited—for example, to protect the intellectual property they represent. MCO models cannot be edited, so make sure you have a backup copy of your original models before clicking this button. |

|
Password settings Opens the Machine Definition File Protection dialog box where you can create a password for your component library. |
Right-click menu
The available options depend on whether you right-click on a group name, component name, or the base node.
Edit
Displays the properties for the component so you can view or edit them.
Groups
Opens the Groups dialog box so you can add a new component group.
Add component/chuck/chuck jaws
Adds a new component at the current location in the tree. Depending on where you right-click, the appropriate component type is pre-selected.
Properties
View or edit properties for the selected component.
Rename
Edit the component name.
Delete
Removes the selected component from the tree.
Delete all children
Removes all components inside the current node in the component tree, but not the component itself.
Delete component and all children
Removes all components inside the current node plus the selected component itself.
View
Displays the component in the graphics window.
View component group
Displays all of the group's components in the graphics window.
Expand all, Expand group
Expands all of the nodes in the component tree or the selected group.
Collapse all, Collapse group
Collapses all of the nodes in the component tree or the selected group.
Export to XML file
Generates an XML file with information about the components in the tree. This is intended for use by Mill-Turn machine developers.
Convert units to U.S./metric
Converts an U.S. component library to metric, or vice versa. This converts the solid model and all of the settings for each tool locator or component, but not any other geometry that is associated with the component, such as pick points or construction geometry.
Learn more
- Introduction to Mill-Turn Component Libraries
- Introduction to Tool Locators
- Introduction to Mill-Turn Steady Rests
- Importing Components Into a Component Library
- Adding Chuck Jaws and Collets (Mill-Turn)
- Default Chucks, Jaws, and Collets
- U.S. and Metric Component Libraries
- Groups dialog box: Mill-Turn


