Web based TethysL Editor
This page describes the web-based editor, located at https://okeanids.mbari.org/tethysl/.
note
More recently, we have been focusing our attention on enabling more standard editors and IDE's with TethysL capabilities. See VS Code.
First run
Upon very first run of the Web based TethysL Editor, you will be asked to select the type of workspace you want to use:
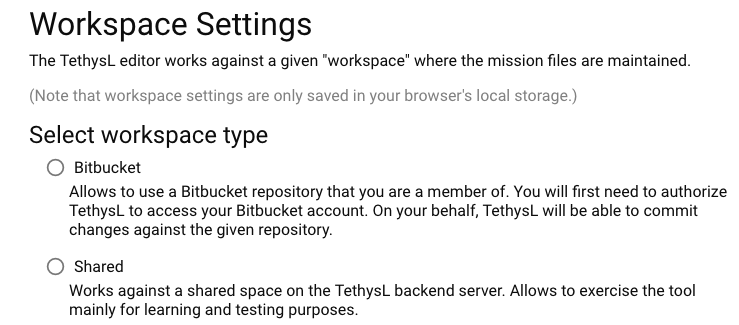
As indicated in the screenshot:
-
Bitbucket workspace: Allows to use a Bitbucket repository that you are a member of. You will first need to authorize TethysL to access your Bitbucket account. On your behalf, TethysL will be able to commit changes against the given repository. See below for more details.
-
Shared workspace: Works against a shared space on the TethysL backend server. Allows to exercise the tool mainly for learning and testing purposes.
In the following, we will be focusing on the Bitbucket workspace.
Bitbucket settings
When selecting Bitbucket, you will be prompted to authorize TethysL:
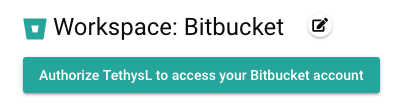
Click the button and you will be taken to a Bitbucket page where you can verify the requested permissions and proceed with the authorization.
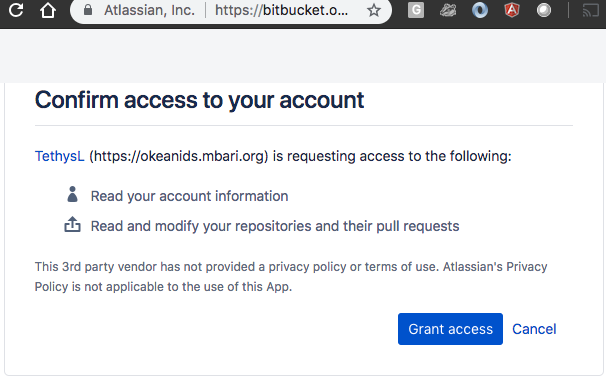
Once you grant access, Bitbucket will redirect your browser back to TethysL to continue the workspace setup.
TethysL will first retrieve all repositories where you are a member of, so you can select the particular repository to be used:
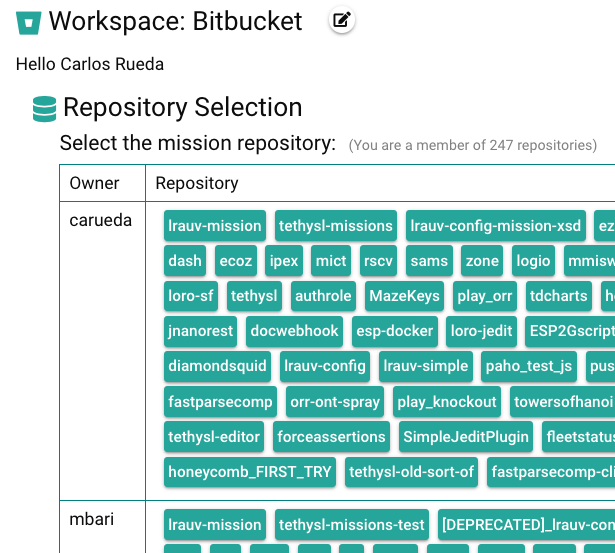
Note
Typically you will be selecting either the primary mbari/lrauv-mission repository (if you have permission and want to commit your changes directly there) or a fork of that repository (to then presumably follow a typical "pull request" workflow to integrate your changes).
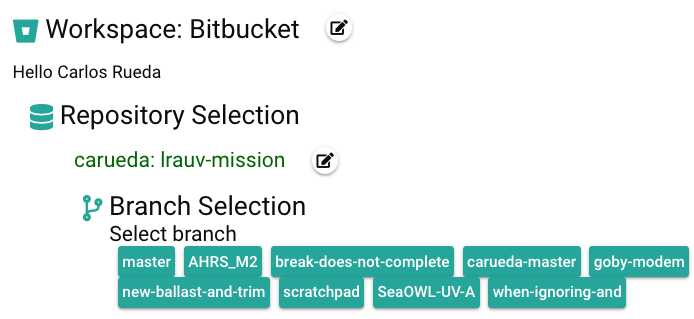
Once the repository is selected, you will then be presented with all corresponding branches so you can select the one to be used:
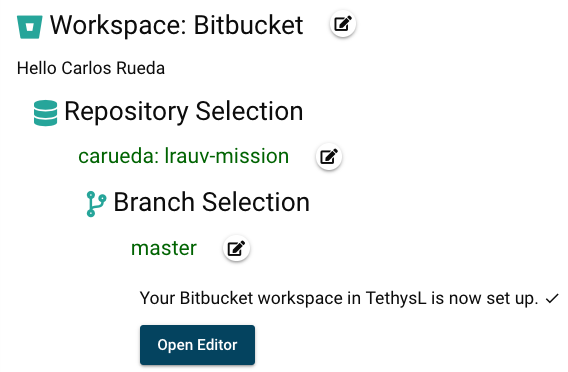
With the repository and branch already selected, click 'Open Editor' to start using your Bitbucket workspace:
Using the TethysL Editor
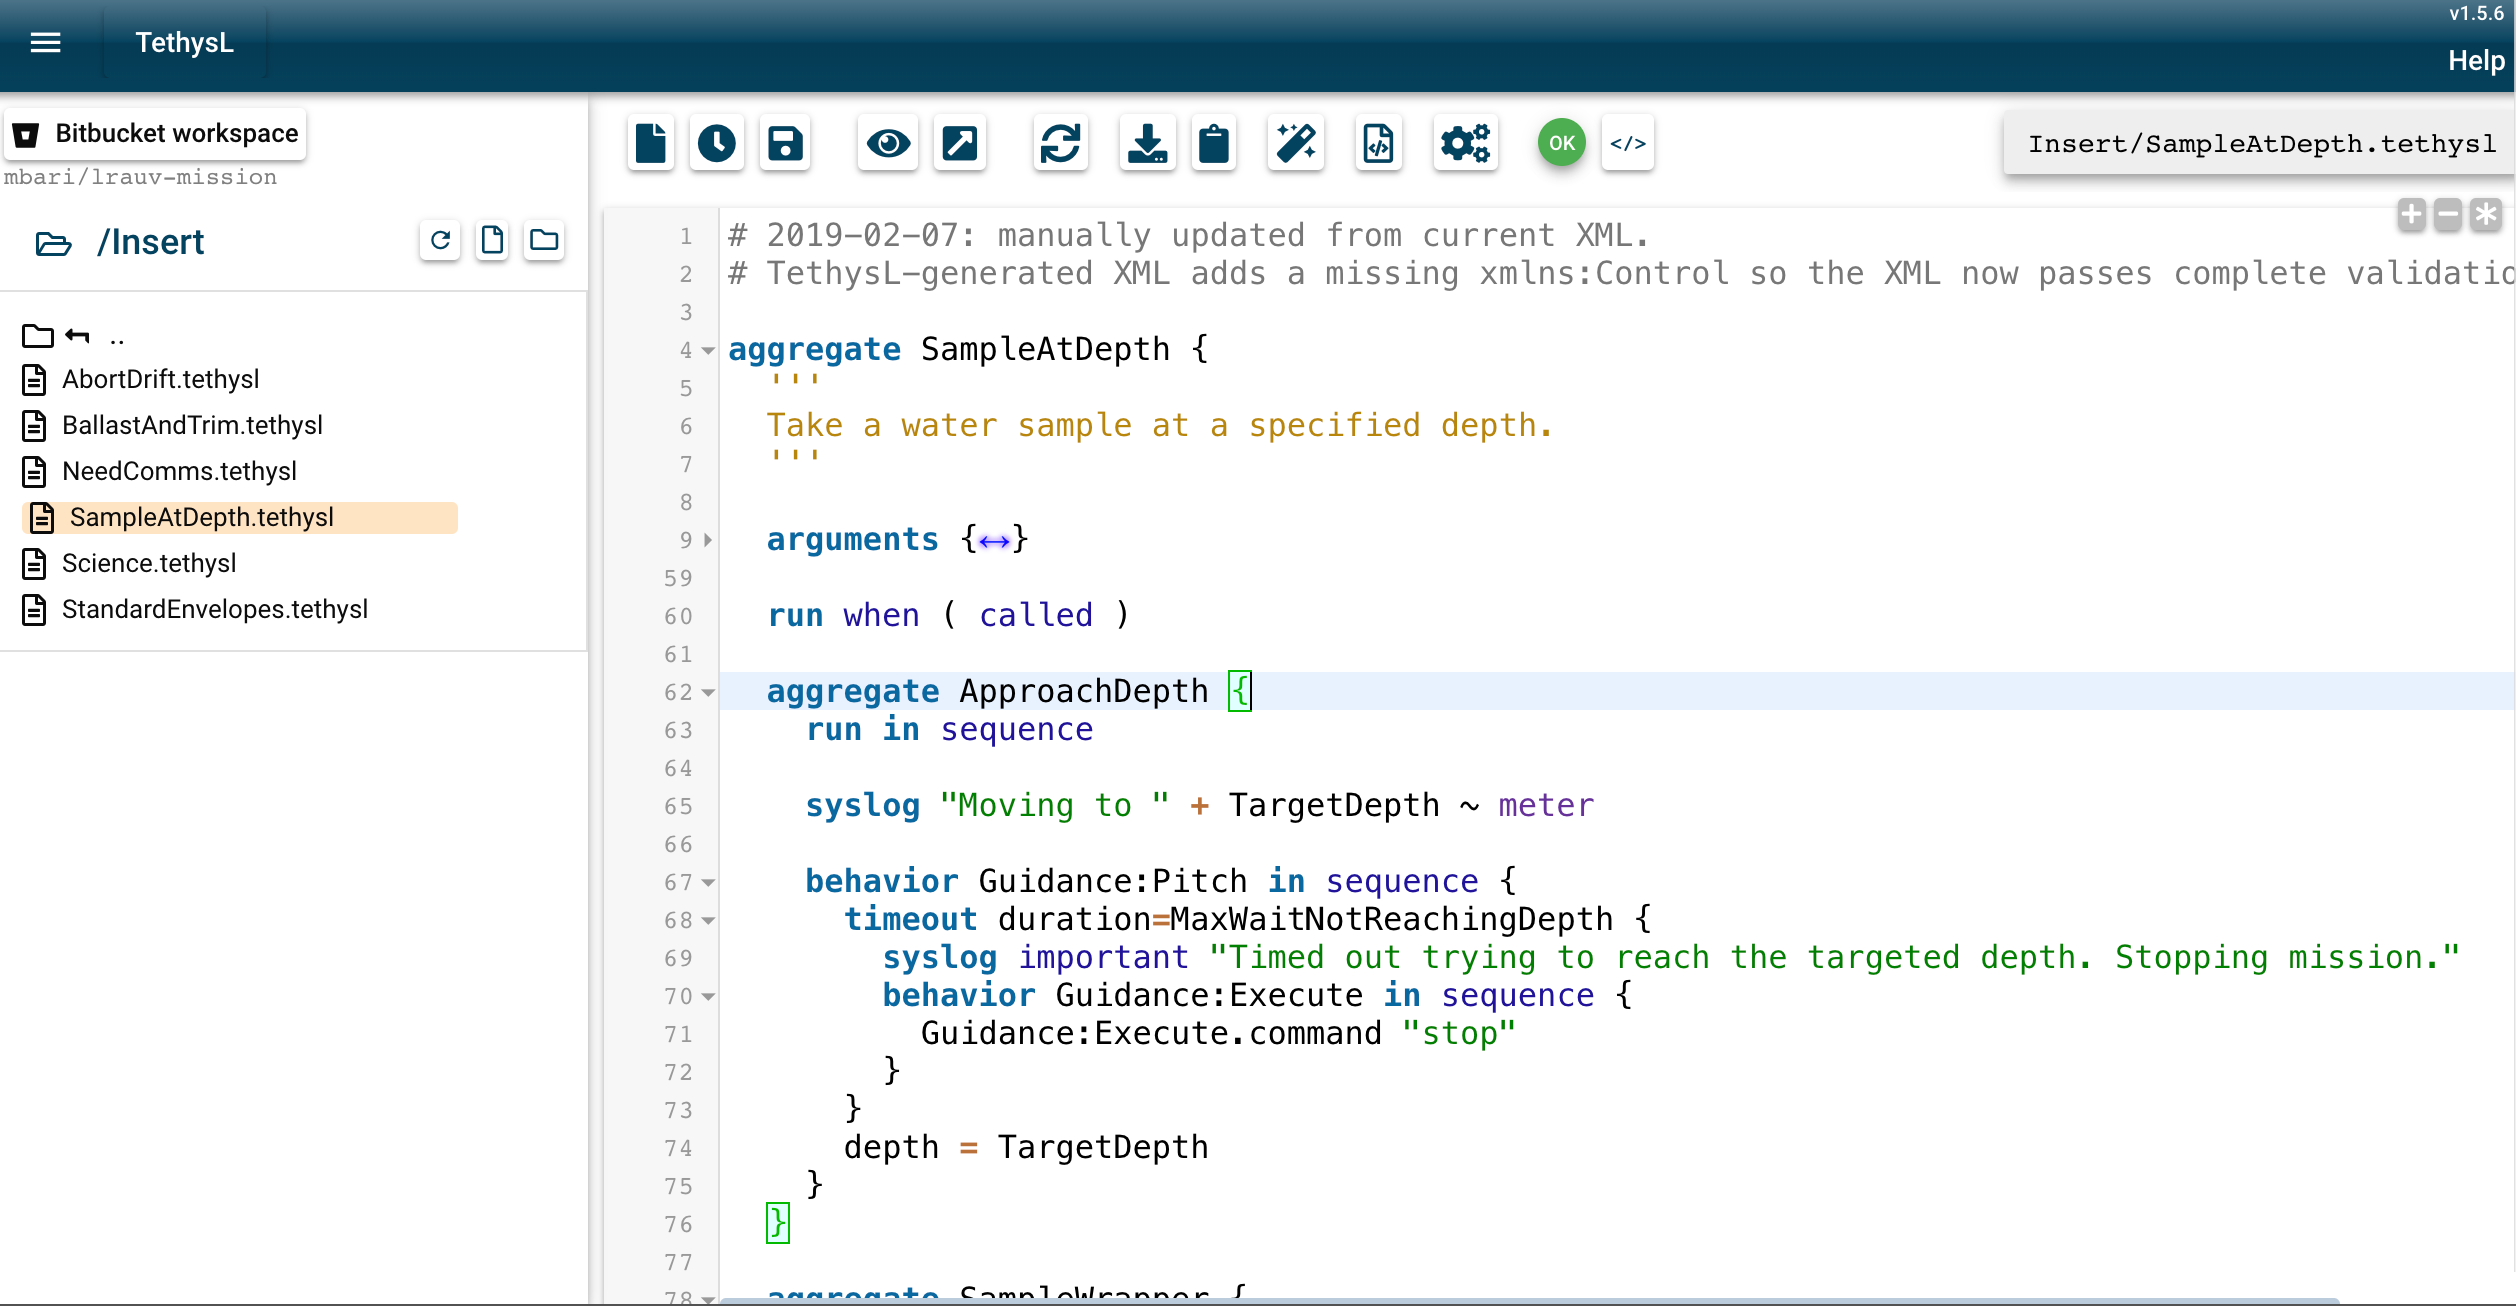
The general interface layout is comprised of two main sections:
1. Left-hand section for workspace settings and browsing
-
Workspace type: Either 'Shared' or 'Bitbucket' with corresponding repository name and selected branch. You can click this indicator to see the details of the workspace and also to switch to a different workspace.
-
Directory view to browse the workspace. Here you can select an exisitng script to be edited, or create a new one.
2. Right-hand section for main TethysL Editor
Buttons (and corresponding keyboard shortcuts):
-
X- Shows original XML (if available) corresponding to the name of currently opened TethysL script -
X⇒T- Performs XML-to-TethysL translation -
- Opens dialog to select a script from the cached list of all scripts (Ctrl+O or Cmd+O).
-
- Opens dialog to select a recently edited script (Ctrl+E or Cmd+E).
-
- Saves the script (Ctrl+S or Cmd+S). The saving will be in your browser's local storage when using a Bitbucket repository, and a persistent save when using the Shared workspace.
-
- Opens the "Diff" dialog (Ctrl+D or Cmd+D).
-
- Opens the commit dialog.
-
- Reloads the script.
-
- Downloads the script.
-
- Displays the script in a separate area in the interface to facilitate printing its contents using regular browser options. Here's an example of a PDF generated through this mechanism. (Ctrl+P or Cmd+P)
-
- Copies the script source to the clipboard.
-
- "Prettifies" the script (Ctrl+Y or Cmd+Y)
-
- Compiles the script (Ctrl+K or Cmd+K)
-
OK- Opens dialog with all symbols associated with the script upon a successful compile (Ctrl+J or Cmd+J) -
ERROR- Moves cursor to the location of the compile error (F2) -
⇒X- Opens dialog with the generated XML upon a successful compile (Shift+Ctrl+X or Shift+Cmd+X) -
T|X- Opens dialog with both TethysL and generated XML side-by-side upon a successful compile.
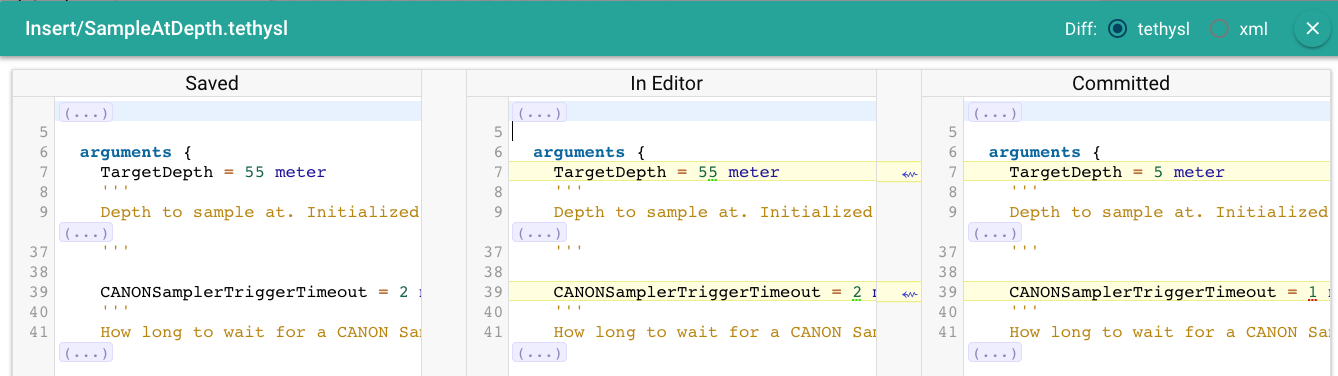
Diff Dialog
This view displays any differences in the main editor script contents with respect to the saved contents and also the committed contents.
It starts by showing the diff for the .tl artifacts:
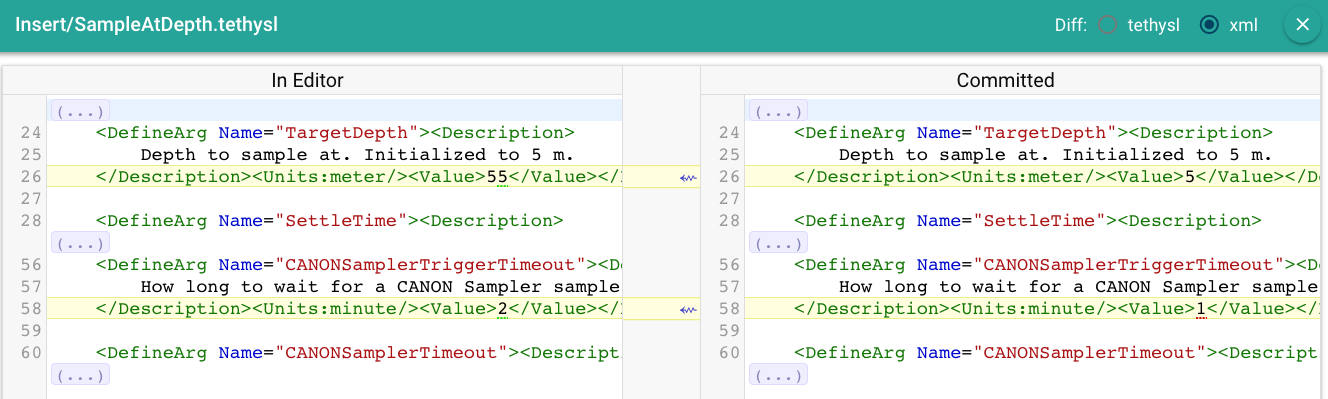
Click "xml" to show the diff for the .xml artifacts:
Commit Dialog
This view allows to commit changes to Bitbucket.
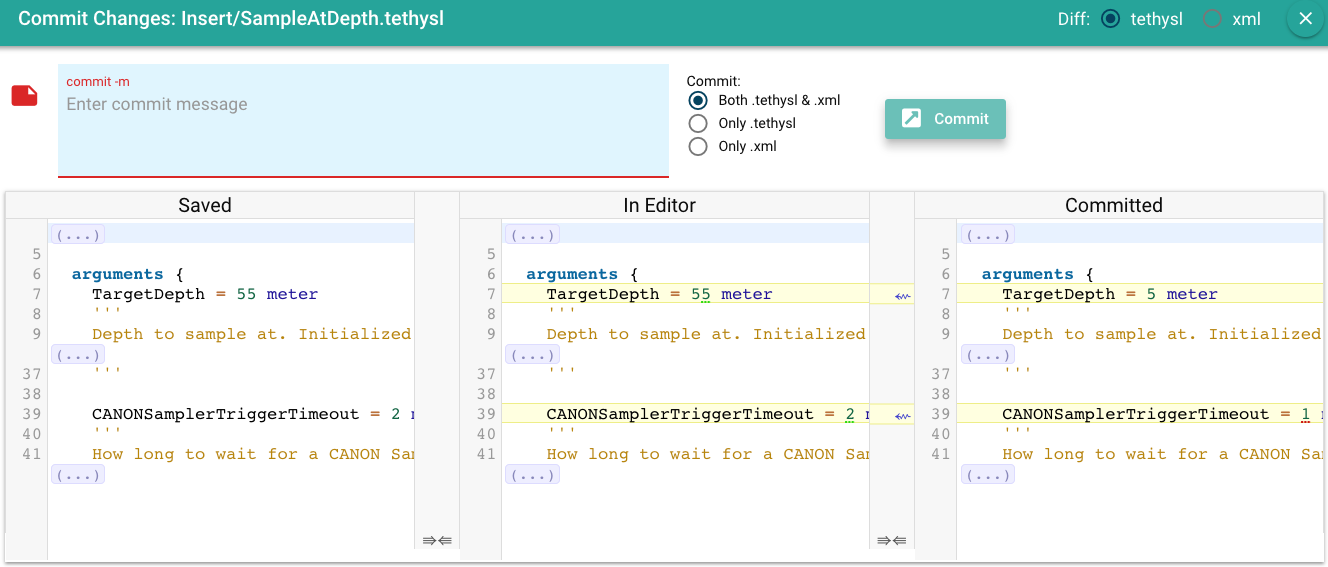
Similarly as with the Diff view, you can inspect any differences between
the relevant artifacts before proceeding with the commit.
You also have options to indicate what specifically to commit:
both the .tl and .xml; only the .tl; or only the .xml.
Note
These various commits options are intended to facilitate the transition process, in particular considering that some existing .xml files are invalid for some reason or another (e.g., do not pass schema validation, or have undefined entities); but we still want to start integrating the .tl counterparts as a way to help address the issues.
Creating a new TethysL script
-
On the workspace browse section, navigate to the directory where you want to create the new mission.
-
Click the button and enter the name for the new mission or aggregate. Do not enter any file extension.

-
Edit the new file, save it, and commit it as needed.

Validation and translation
Syntax analysis is automatically executed as the TethysL source is edited. Any error in this case is indicated with a small icon on the left side in the editor. You can hover your mouse over the relevant area to see more details about the syntax error.
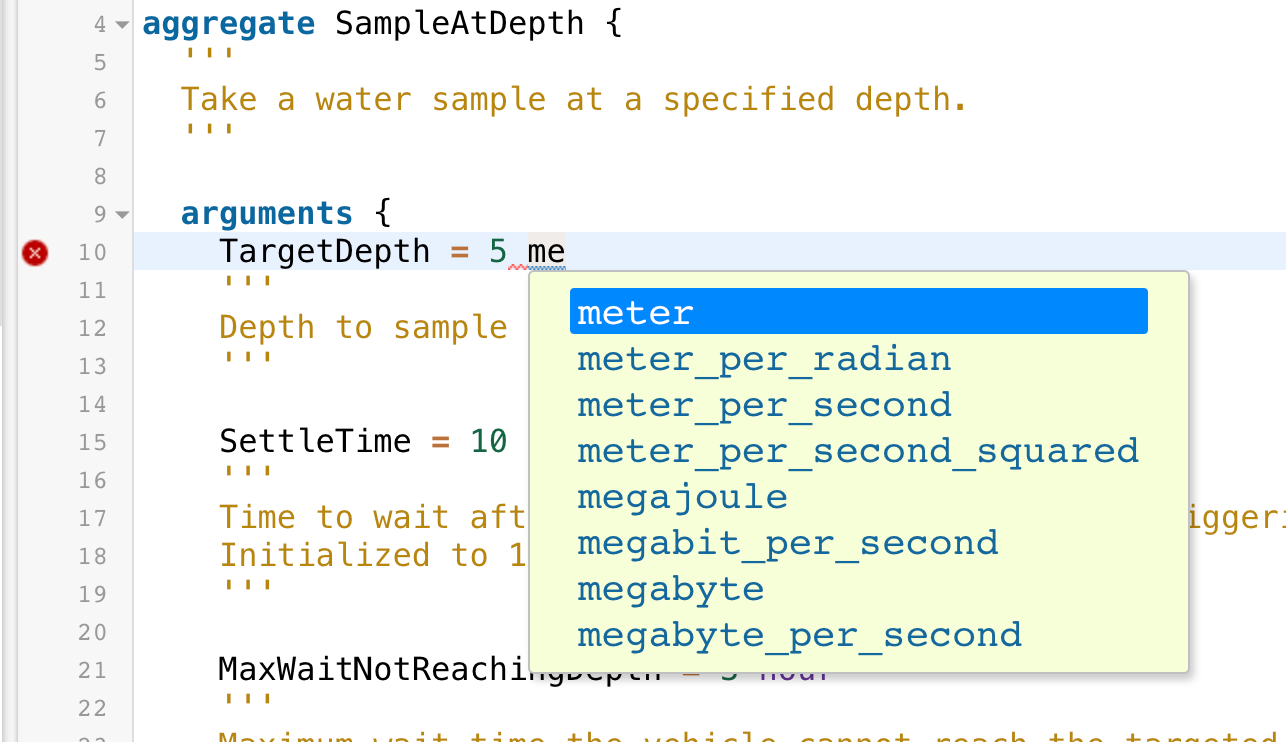
As part of the syntax validation phase, TethysL can provide autocompletion options, which are triggered by typing Ctrl+Space. For example, for a unit:
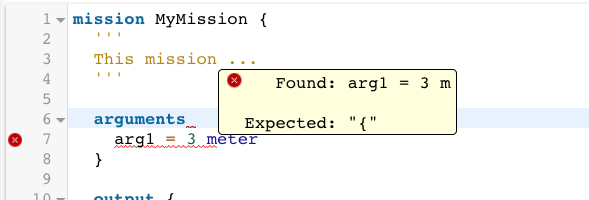
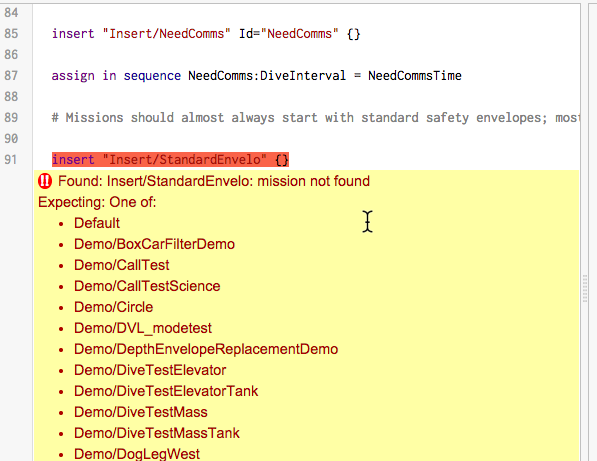
Click the button (or type Ctrl+K or Cmd+K) to perform a complete semantic analysis (and resulting translation to XML). Any error in this case is immediately reported with a more prominent widget. Click the Error icon (or press F2) to move the cursor to the location of the error. In cases where the error is about an expected token from a known list of valid choices (e.g., a unit, an existing mission file or behavior name), type Ctrl+Space to select the appropriate value.
XML validation
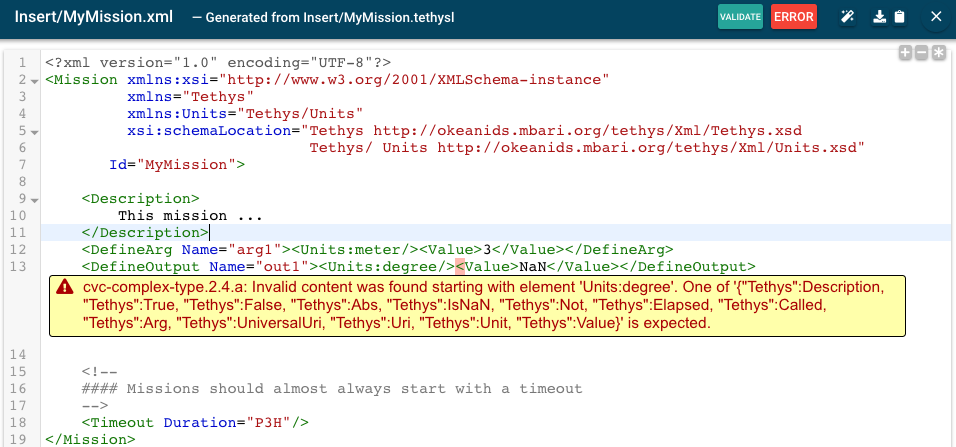
Upon a successful compile, select the ⇒X
button (or type Shift+Ctrl+X or Shift+Cmd+X) to see the generated XML.
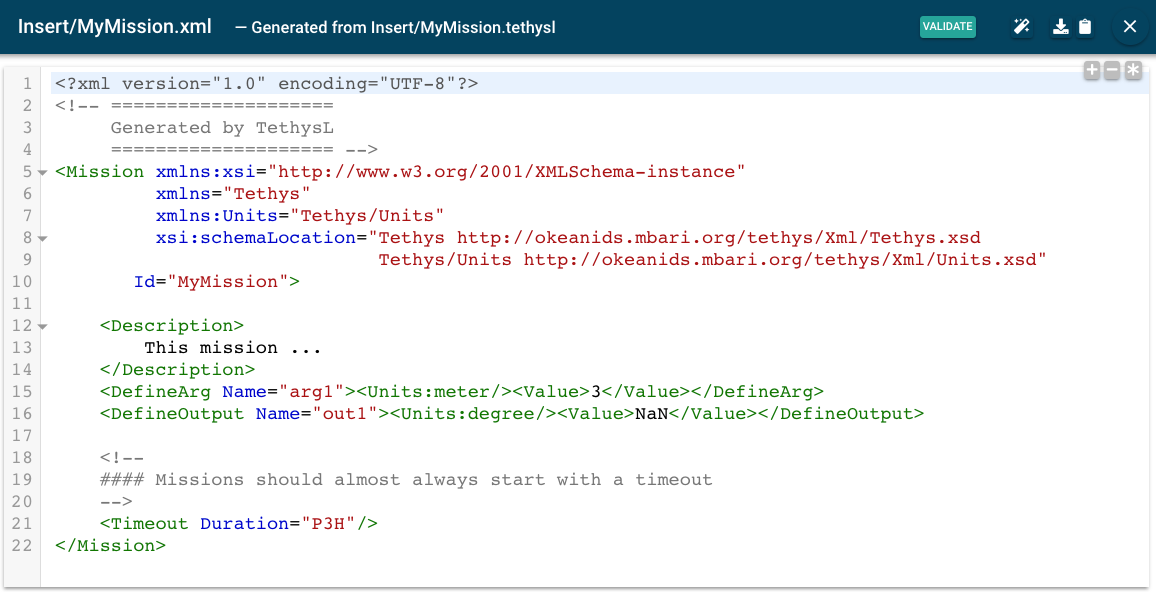
In this dialog, click the 'Validate' button (or type Shift+Ctrl+X or Shift+Cmd+X) to perform a strict validation of the generated XML against the Tethys XML Schemas.
Note
For convenience, the text area in the XML dialog is freely editable, which helps with performing the strict validation of any XML contents that you want to test. Here's an example (with an error entered on purpose for illustration):