VARS Annotation Setup
Service Configuration
VARS requires a running backend microservice stack. The vars-quickstart-public project provides a Docker-based setup for all required services. Once the backend is running:
- Download VARS from GitHub.
- On macOS, if you see a message that VARS is damaged and can't be opened, Apple's Gatekeeper is blocking it. To bypass it:
- Open a terminal (Terminal.app is in
/Applications/Utilities). cdto the folder where VARS is installed, for examplecd /Applications.- Run
sudo xattr -d -r com.apple.quarantine "VARS Annotation.app". - Relaunch VARS Annotation.
- Open a terminal (Terminal.app is in
- Point VARS at your configuration server (Raziel), as described below.
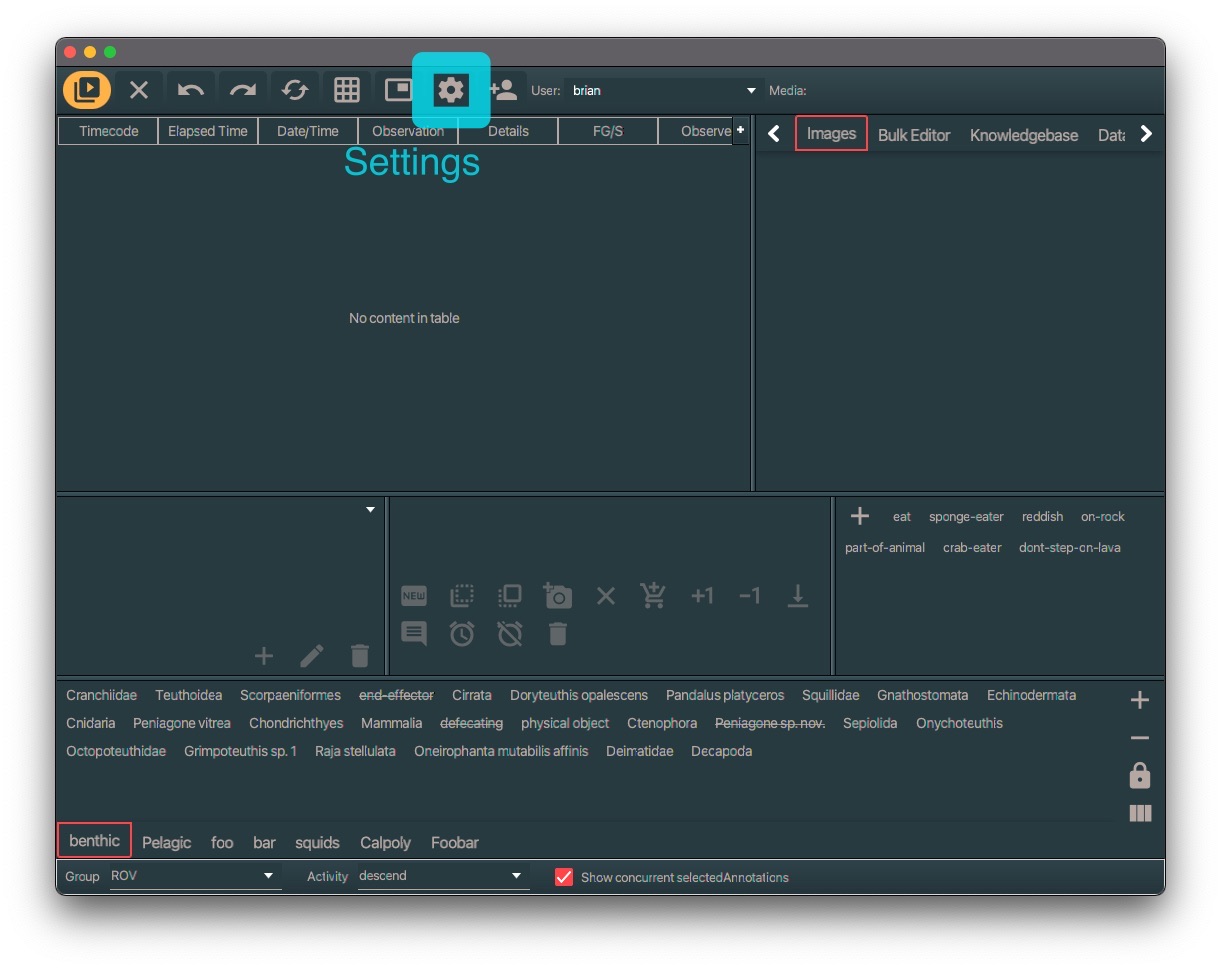
Open the settings dialog
Click the settings button.
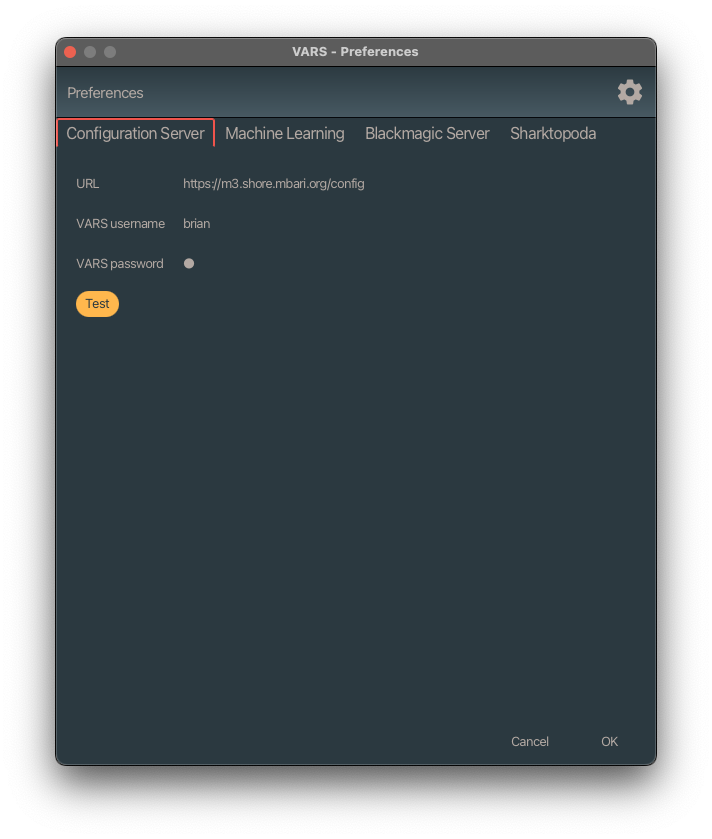
Add your configuration server
Enter the URL of your Raziel configuration server, along with your VARS username and password.
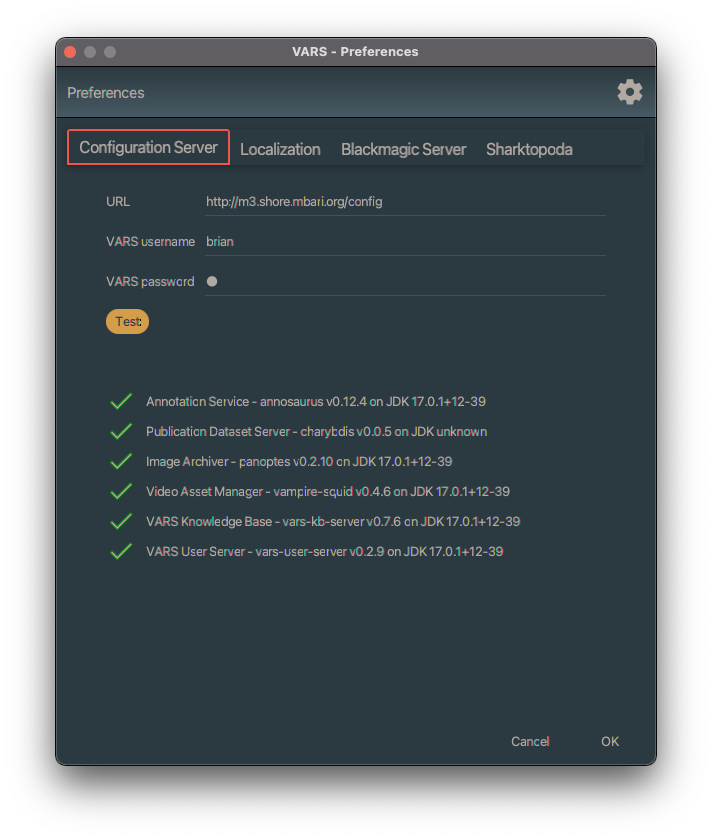
Test your configuration
Click Test to verify the connection. If your dialog looks like the image below, click OK.
Video Player Configuration
VARS communicates with external video players using UDP. VARS and the video player must be configured to use the same UDP port number.
VARS port setting
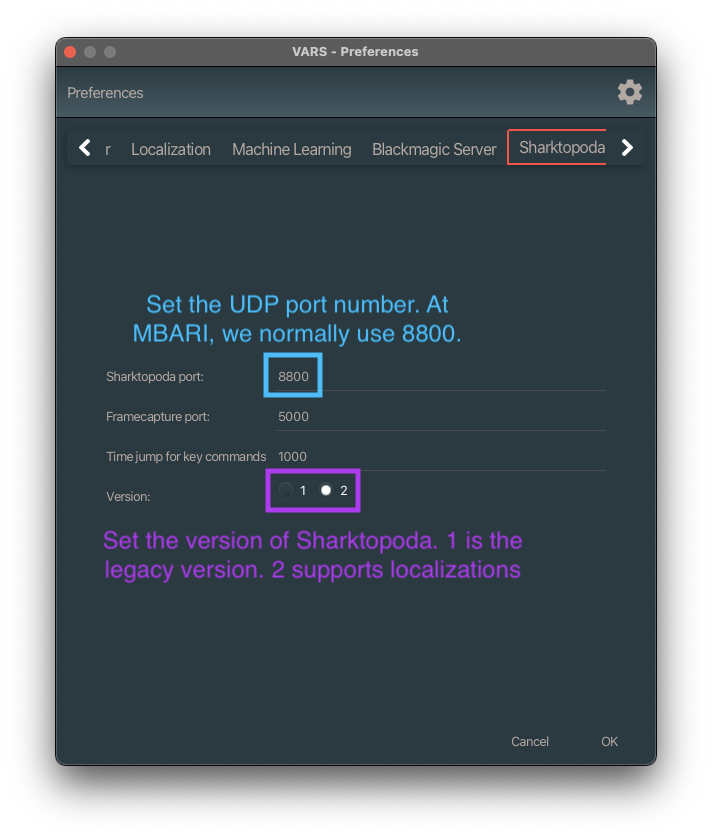
Sharktopoda port setting
In Sharktopoda, open Sharktopoda > Preferences:
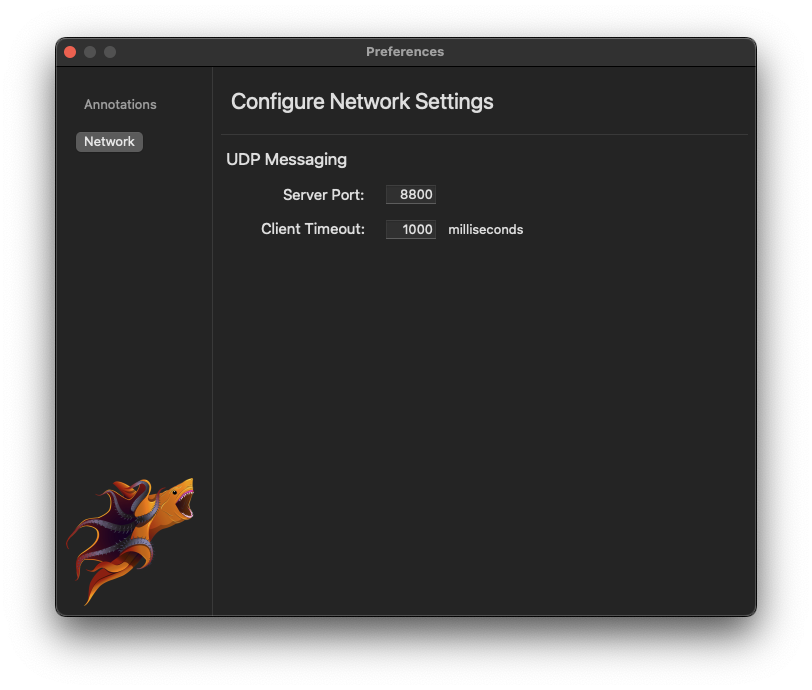
Sharktopoda annotation settings
If you are working with localizations (bounding boxes drawn directly on video), check these settings in Sharktopoda:
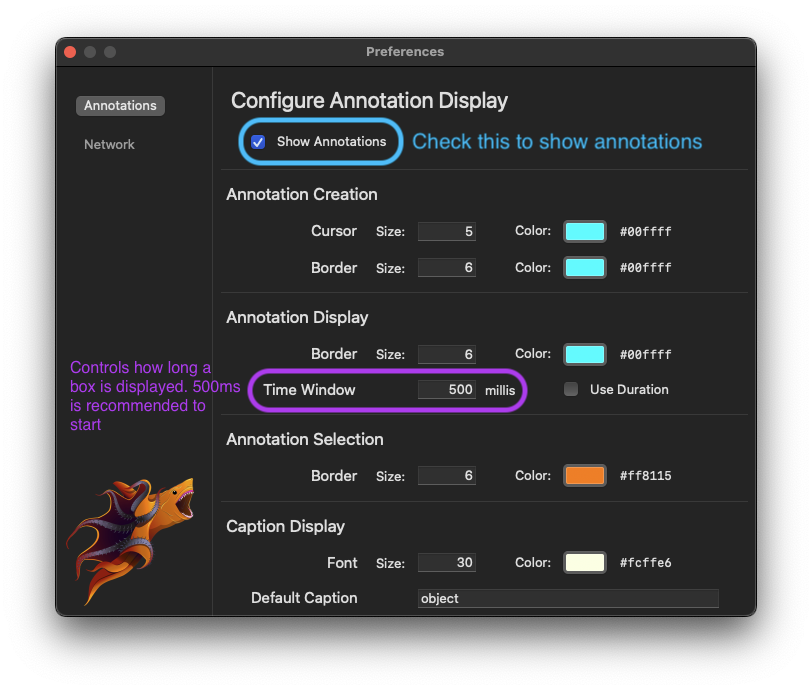
Machine Learning Configuration
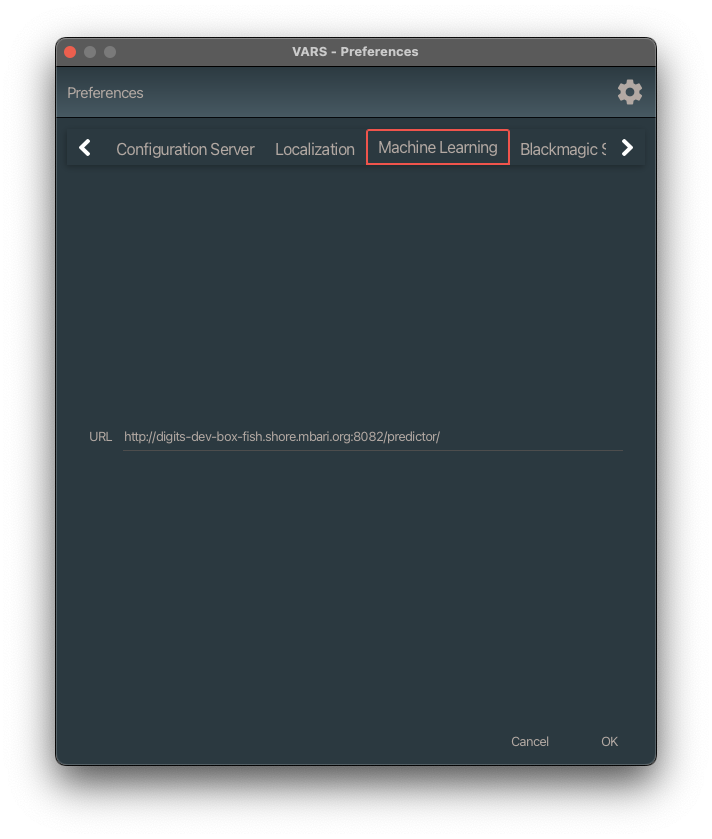
Configure the ML endpoint
VARS can send the current video frame to a remote server that applies machine learning to the image. To configure this, enter the URL of your ML endpoint in the settings dialog.
Use ML
Click the ML button to send the current frame to the ML service. A window shows the proposed annotations. These annotations are not saved to the database until you explicitly accept them.

The ML window displays the captured frame along with the proposed annotations:
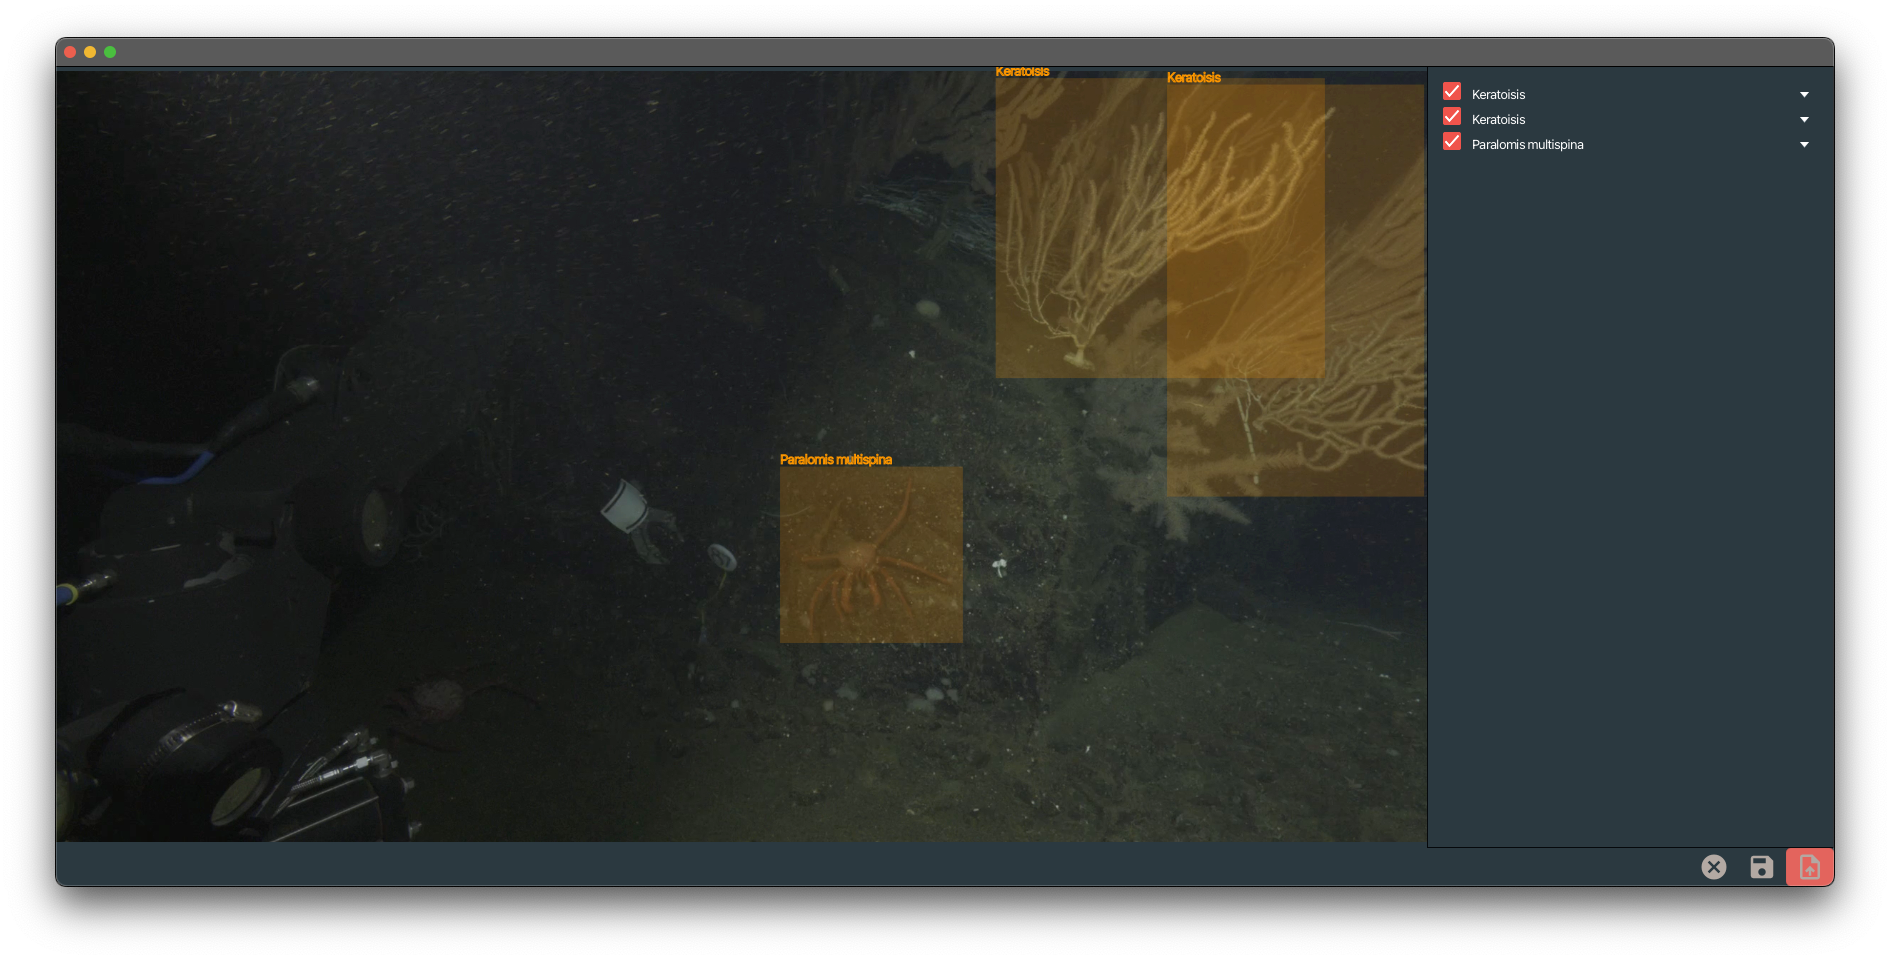
Use the checkbox next to a proposed annotation to deselect it, and use the combo box to edit its concept name. When you're ready, click one of the three buttons at the bottom:
- Cancel: close the window without saving anything.
- Save annotations: save the accepted annotations to the database.
- Save annotations and image: save the annotations and create a framegrab from the ML window.