Using the editor
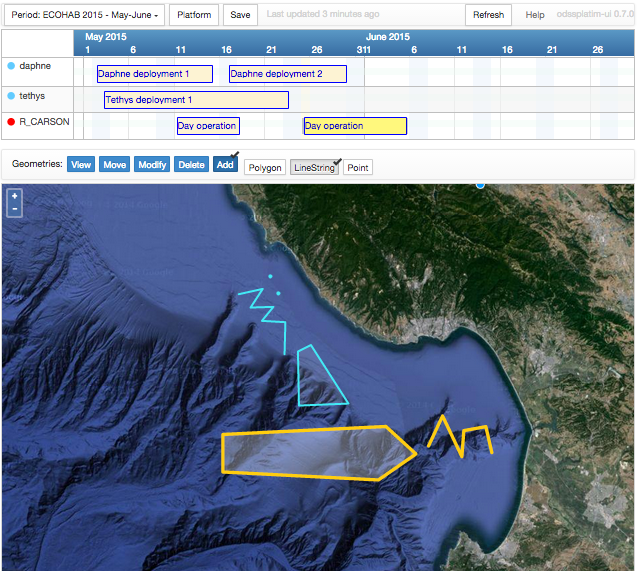
General interaction
- Timeline:
- use your mouse or trackpad to navigate and zoom in and out;
- hovering your mouse over a token highlights the token and also the associated geometries on the map;
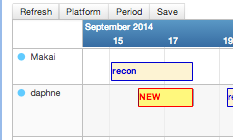
- double click on an empty space in the timeline to create a new token;
- click on a token to select it; this also selects the associated geometry on the map;
- drag a selected token to change its time range, or its associated platform;
-
double click on an token to edit its associated details.
-
Map:
- use your mouse or trackpad to navigate and zoom in and out;
- hovering your mouse over a geometry highlights the geometry and also the associated token on the timeline;
- click on a geometry to select it along with its associated token;
- click one of the view or edit modes to enable corresponding functionality;
Buttons
Period drop-down button
A "period" is some time span of interest. This button shows the currently selected period and allows to
do various operations on the periods.
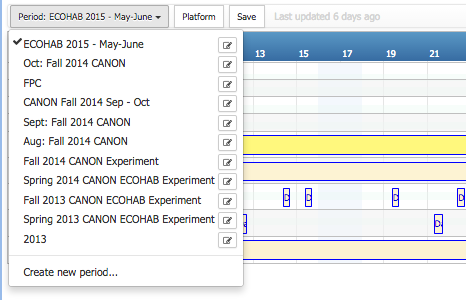
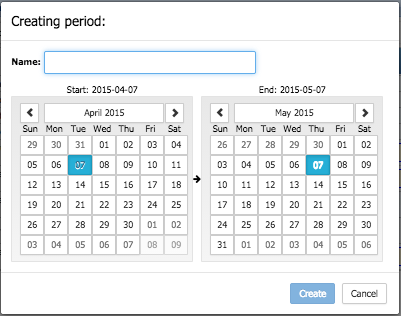
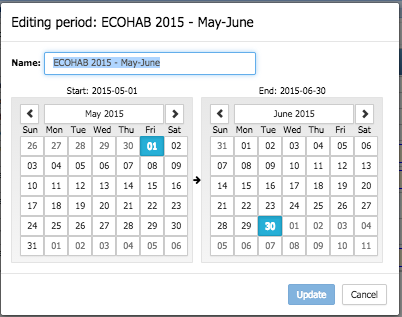
From the dropdown one can change the period to be visualized, edit any of the existing periods, and create a new period. When editing an existing period, or adding a new one, the following are possible actions on the corresponding dialog:
- Create: Saves the newly defined period.
- Update: Saves the changes to an existing period.
- Delete: Delete the selected period from the database.
- Cancel: Cancels the dialog.
Platform button
This button allows to change the current selection of platforms:
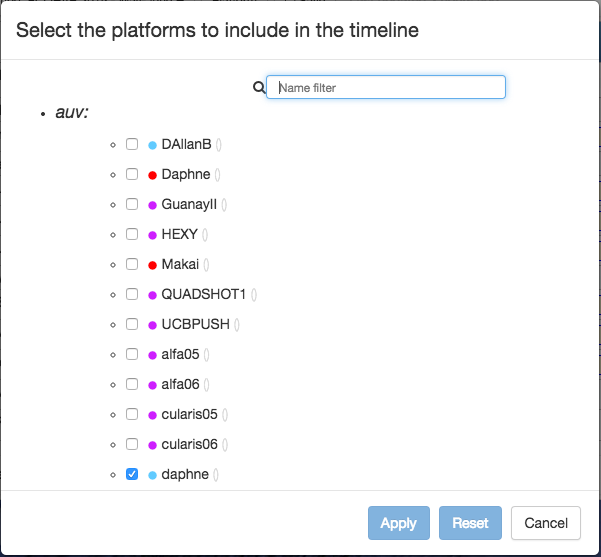 The Apply button saves the modified selection.
Save button
This button saves all new and modified tokens. Before being saved, the name and style of these tokens are
highlighted in a way similar to the following:
Refresh button
This button reloads the timeline from the database. If there are any unsaved changes, a confirmation dialog will appear.
Entering a new token
To enter a new token double-click on the timeline area corresponding to the desired associated platform and
approximate starting date. This will introduce a new token in the widget:
-
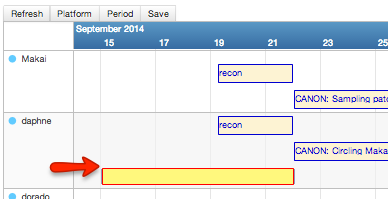
You can then drag the token position or change the starting or ending dates by dragging the icon that appears at the corresponding end of the token.
-
But you can also double click the token to edit this and other details:
- Name: this a short name for the activity, task, or state associated with the token.
- Description: some more extended text describing the token.
- The start and end dates and times can be specified here with more precision if needed.
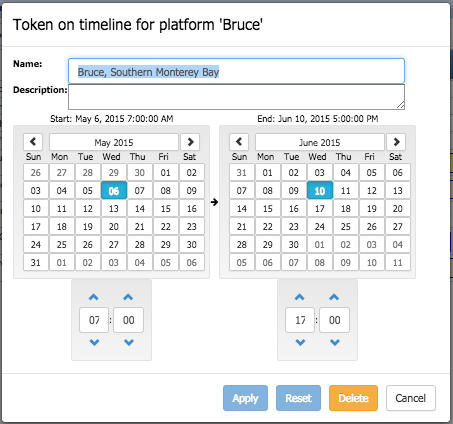
The buttons in this dialog are:
- Apply: This button applies the changes so they get reflected in the timeline, but this is not persisted immediately in the database. To actually save the changes of the token in the database (or add the token if new), use the Save button in the main timeline interface.
- Reset: This button reverts any changes in the form.
- Delete: This button allows to delete the token if already existing in the database.
- Cancel: Cancels the dialog.
"Copy-n-add" feature
This feature facilitates the addition of tokens that share similar information (e.g., same duration and start time) and associated geometry:
- Select the token you want to be used as basis for new tokens. This selection is via the usual click on the token;
- Press 'C' or 'c' on your keyboard — the selected token gets copied in an internal clipboard. With uppercase 'C' the associated geometry will also included in the copy. Lowercase 'c' does not include the geometry.
- Add a new token anywhere on the timeline with the usual double-click under the desired date;
- The new token will start at the clicked year-month-day date on the timeline, but will get the time (hour:min:sec), duration, and name from the token that was last copied with the 'C' or 'c' keystroke. If 'C' was used, a copy of the geometry will be associated to the new token.