Email Notifications Dialog
Note
Some screenshots below to be updated. Please reach out if you have any questions.
The "Email notifications" button under the account dropdown will open a dialog with your email notification settings:
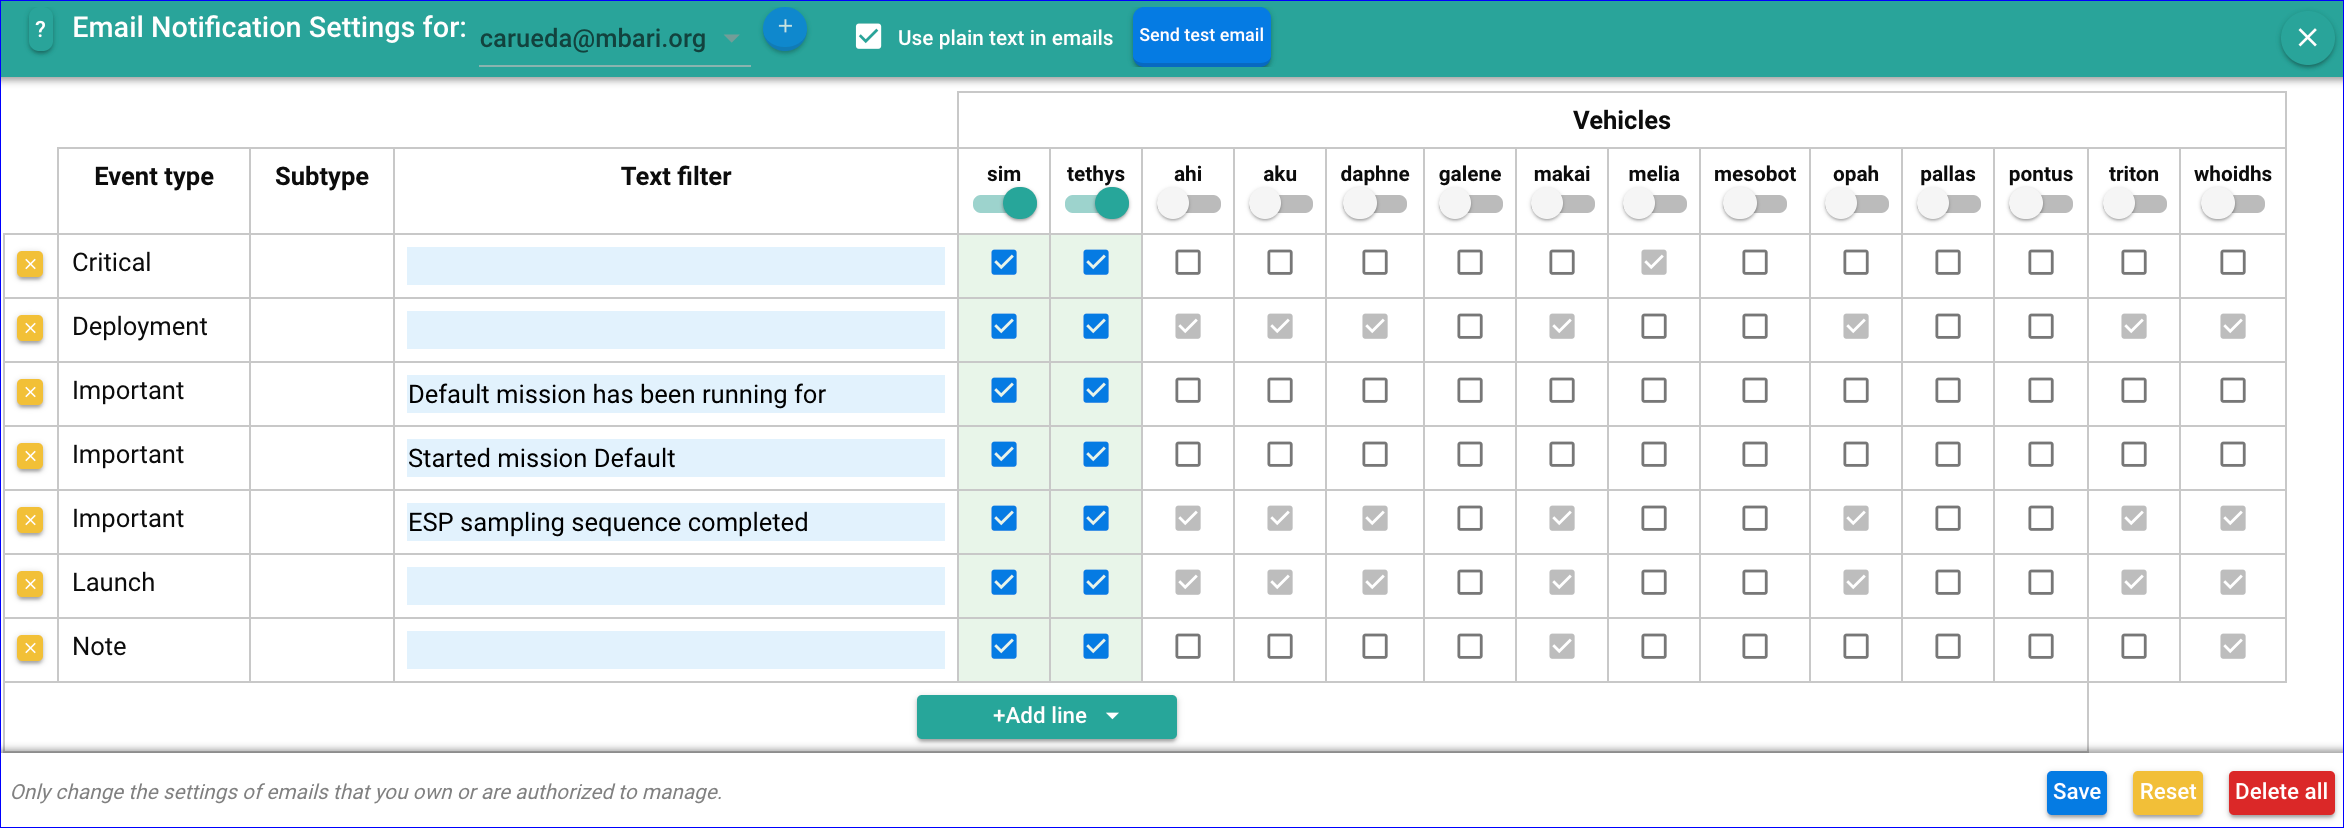
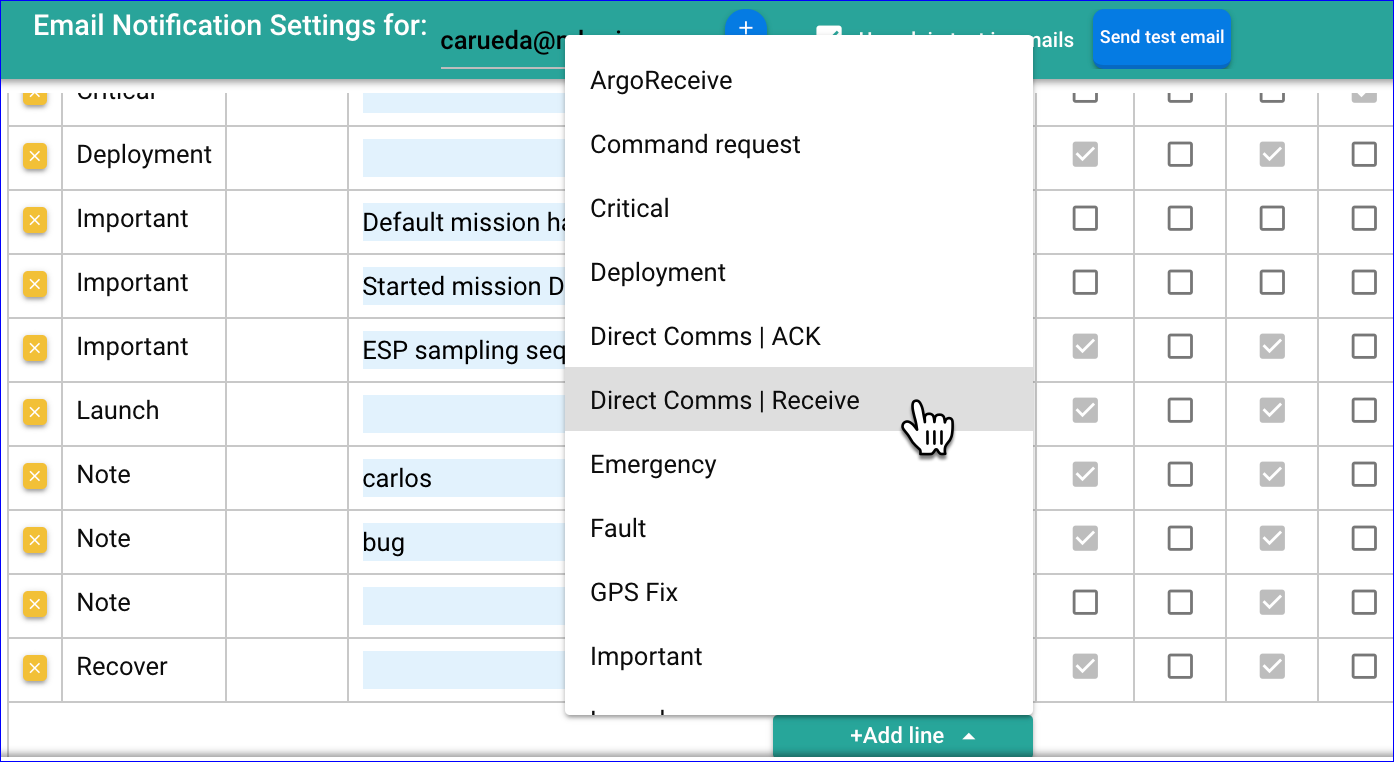
To add a notification setting, use the +Add line button
to first select the desired event type and subtype:
Text filter
This field is optional. If a string is entered, then the email notification will only be triggered if the text associated with the event contains the given string. The check performed here is case-insensitive.
Associated vehicles
Select the checkboxes for the desired vehicles to be associated with the new line. At least one vehicle should be selected.
Note that, initially, the notifications will be disabled for each vehicle. To enable or disable them on per-vehicle basis, check/un-check the corresponding vehicle column header.
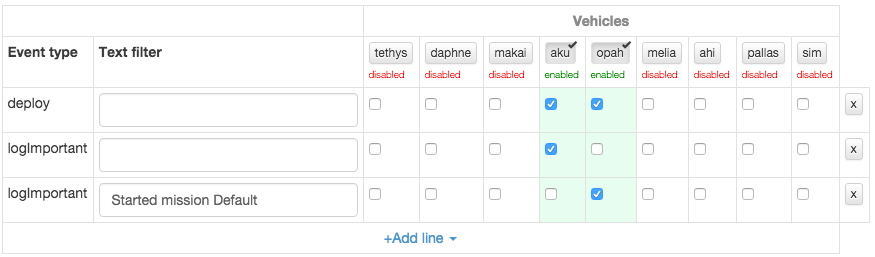
The following shows an example of some settings:
The checkbox in each vehicle column header allows one to quickly disable/enable all notifications for the corresponding vehicle without having to remove, re-enter, or change the settings themselves at all.
** Adding an email **
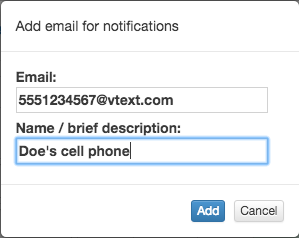
If you want to associate some of the notifications to other email addresses (that you own or are authorized to manage), click the email header in the main notification settings section and select the "Add email" option:
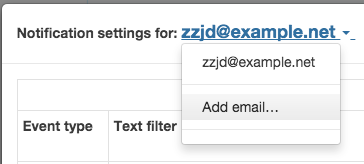
Enter the desired email and a brief description:
Then enter the associated notifications as needed.